System dashboard
Use Game Card System to initialize the current scene, check setup status, open daily tools, and reach project and support resources
Open the window from this menu:
Tools > TinyGiants > GCS > Game Card System
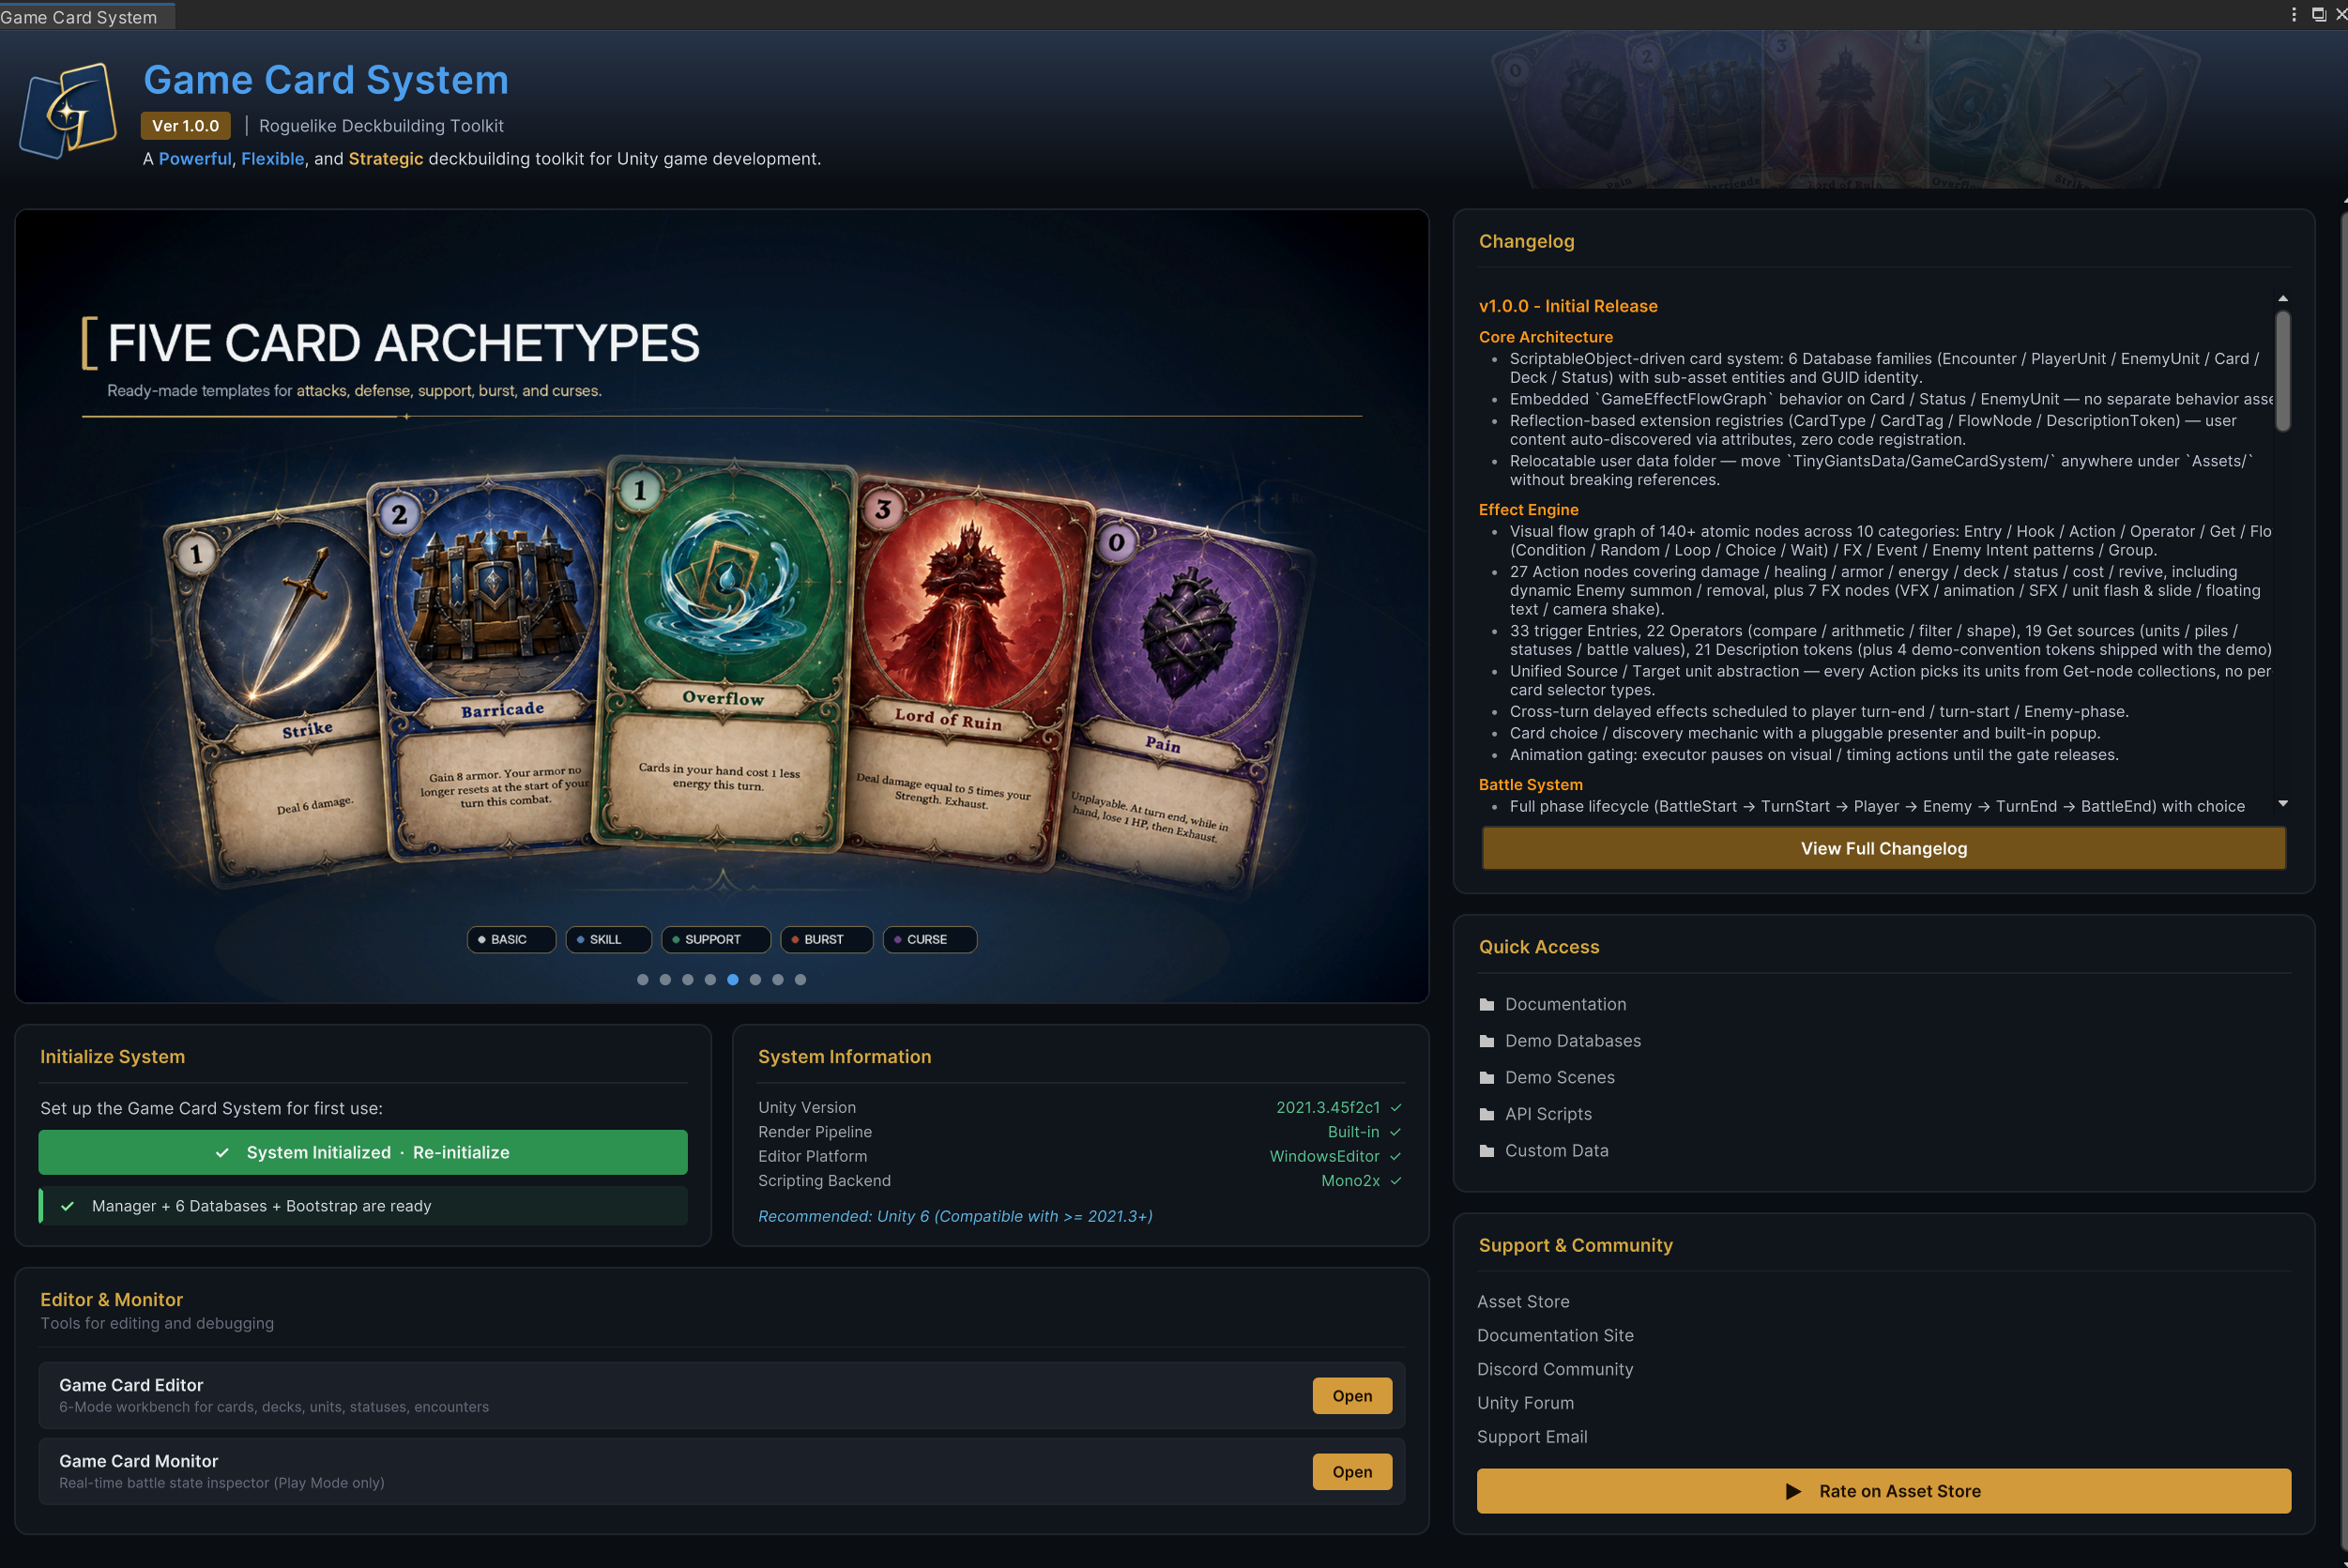
The left column above handles current-scene setup, environment information, and daily tools. The right column provides the Changelog, project directories, and external support links. The header shows the window version, product positioning, and a preview of the included battles. See Installation and initialization for the actions and results under Initialize System and System Information.
Open authoring and diagnostic tools
After the system and scene initialize successfully, both Open buttons under Editor & Monitor become available.

Game Card Editor above handles content authoring. Game Card Monitor traces the runtime in Play Mode.
| Entry point | Window opened | Actual working scope |
|---|---|---|
Game Card Editor | Game Card Editor | Creates and edits content in Card, Deck, Player, Enemy, Status, and Encounter modes. The Database dropdown lists only Active databases on the current Manager |
Game Card Monitor | Game Card Monitor | Inspects battle, piles, units, phases, FlowGraph, events, and wait state. It refreshes live in Play Mode, and its content depends on the current Manager and battle state |
Both windows also open directly from the Tools > TinyGiants > GCS menu. See Game Card Editor and Game Card Monitor for their complete workflows.
Check the version, directories, and support links
Check the Changelog

The Changelog card previews the latest version. Click View Full Changelog to inspect the complete history. After an upgrade, you can check the delivered version here without leaving Unity or editing package files.
Locate directories through Quick Access
Quick Access does not move or modify assets. It resolves common directories from the current GCS installation and user-data locations.

The first click selects the matching directory in the Project window. When it is already selected, clicking the same entry again opens that directory.
| Entry point | Actual location and content |
|---|---|
Documentation | The Docs/ directory under the current GCS installation |
Demo Databases | Demo/Databases/ under the current installation, containing the six Single-Character preset databases and six focused Multi-Character databases |
Demo Scenes | Demo/Scenes/ under the current installation, containing 13 playable battle scenes |
API Scripts | Runtime/ under the current installation, containing GCS.API.cs and the rest of the runtime code |
Custom Data | The currently resolved user-data root, which defaults to Assets/TinyGiantsData/GameCardSystem/ |
-
If a disk path exists but cannot load as a Unity asset, the entry opens the location in the system file manager instead.
-
Initialize Systemdoes not create the defaultCustom Datadirectory. If the project has no custom content yet, a click with no visible result is expected.
See Project structure for the boundary between installation and user-data directories. Demo content reference and Demo scene reference cover the Demo databases and scenes. GCSApi guide explains the public entry point under Runtime.
Submit a support request
If documentation and local checks through the Console and Monitor do not identify the problem, use Support & Community to request help.

Prepare the following information before submitting a support request:
-
All four environment values from
System Information. -
The complete Unity Console error and call stack.
-
The relevant Game Card Monitor tab and current wait state.
-
Reproduction steps, Encounter name, and related content assets.
Before sending the request, complete one local diagnosis pass through Common symptoms and Runtime errors, then include the evidence above.
After the current scene and all six database types are ready, open Game Card Editor and begin authoring project content in Card, Deck, Player, Enemy, Status, and Encounter modes.