Installation
Import Game Event System, initialize the active scene, and verify that the dashboard reports System Ready.
For a first-time setup in a fresh or existing project. No scripting required to reach a working install.Import the package into the project, then initialize the active scene so its manager stack and default assets are ready to run.
The video above shows the entire process from import to initialization. For a detailed breakdown of each step, see the guide below.
Prerequisites
Before installing, ensure your project meets the minimum requirements:
| Requirement | Minimum Version | Recommended |
|---|---|---|
| Unity Version | 2021.3 LTS | 2022.3 LTS or newer |
| Scripting Backend | Mono or IL2CPP | IL2CPP (for Production) |
| API Compatibility | .NET Standard 2.1 | .NET Standard 2.1 |
Step 1: Import the Package
Depending on how you acquired the plugin, choose the appropriate import method:
- Via Package Manager
- Via .unitypackage
- Open Unity and go to Window > Package Manager.
- Select "My Assets" from the dropdown.
- Search for "Game Event System".
- Click Download, then Import.
- When the file list appears, ensure all files are selected and click Import.
- Locate the
.unitypackagefile on your computer. - Drag and drop the file directly into your Unity Project View.
- (Or go to Assets > Import Package > Custom Package...)
- When the file list appears, ensure all files are selected and click Import.
After importing, Unity will trigger a recompilation. This is normal. Wait for the loading bar to finish before proceeding.
Step 2: Open the System Dashboard
Once imported, access the main hub via the Unity toolbar:
Tools > TinyGiants > GES > Game Event System
The first import will automatically open the Game Event System window
Automatic Environment Check
Upon opening, the System Information panel (located at the bottom of the dashboard) will automatically scan your project environment.
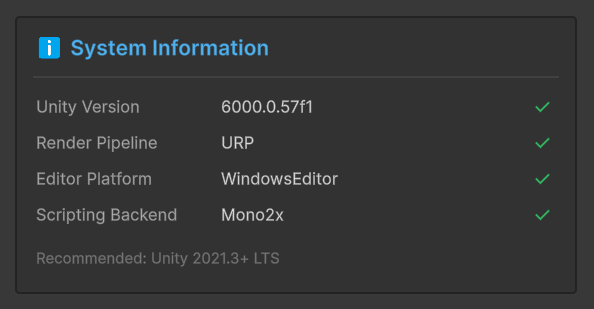
It verifies key compatibility metrics in real-time:
- Unity Version: Validates if you are on a supported version (Green check for 2021.3+).
- Render Pipeline: Auto-detects Built-in, URP, or HDRP. The plugin is compatible with all three.
- Scripting Backend: Displays whether you are running on Mono or IL2CPP.
You don't need to configure anything manually. If you see Green Checks in this panel, your environment is ready.
Step 3: Initialize the System
When you first open the window, the system detects that your scene is missing the required managers.
1. The "Uninitialized" State
You will see a warning banner at the top of the dashboard:
⚠️ Please initialize the system first.
(The action button will appear Dark Blue)

2. One-Click Setup
Click the "Initialize Event System" button.
The system performs the following automated tasks:
- Creates a Game Event Manager GameObject (Singleton) in your scene.
- Generates the default GameEventDatabase asset (if missing).
- Generates the default FlowContainer asset (if missing).
- Compiles the necessary C# generic types.
3. Success
The button turns Green, and the status text reads "System Ready".

Step 4: Verify the Hierarchy & Components
To ensure everything is working correctly, look at your Scene Hierarchy. You should see a new GameObject:
🔹 Game Event Manager
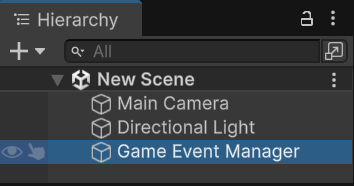
The Component Stack
Select this object. In the Inspector, you will see it is pre-configured with a suite of manager components. Each component is a singleton-based manager responsible for a specific part of the event lifecycle.
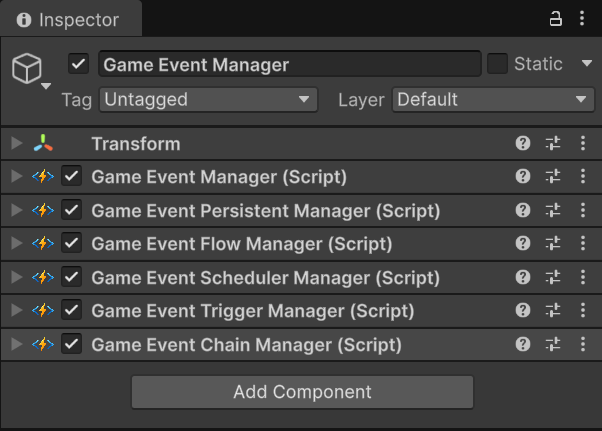
| Component | Responsibility | Key Features |
|---|---|---|
| GameEventManager | 👑 The Core Brain | Manages database loading, event lookups, and static state resets. This is the only mandatory component |
| GameEventPersistentManager | Persistence | Manages events marked as "Persistent" that must survive scene transitions via DontDestroyOnLoad |
| GameEventFlowManager | Visual Scripting | The execution engine for the Flow Graph. It coordinates the logic between Triggers and Chains |
| GameEventSchedulerManager | Time Logic | Handles time-based operations like RaiseDelayed and RaiseRepeating |
| GameEventTriggerManager | Fan-Out Logic | Manages "Trigger" nodes. When one event raises, it can trigger multiple target events simultaneously (Parallel) |
| GameEventChainManager | Sequential Logic | Manages "Chain" nodes. Executes a series of events in order, supporting wait times and conditional breaks (serial) |
This architecture is modular. Technically, you can delete specific managers (e.g., if you don't use Flow Graphs, you could remove the Flow, Trigger, and Chain managers) to minimize the scene footprint.
However, I strongly recommend keeping the full stack attached. These components:
- Have zero overhead when idle (no Update loops).
- Are required for the Visual Workflow to function.
- Prevent "Missing Component" runtime errors if you later decide to use a Delayed Raise or a Flow Graph.
Ready to Go
Your system is now initialized and ready for production.